Wheel Among The Leaves - Baby Boy Afghan

Materials And Tools: Bernat Baby Yarn, sports weight ctegory 3. 1256 yds/1148 m/ ball, color blue, click here for more information about this yarn; Crochet hook, size 3.75 mm, Yarn needle for weaving or hiding yarn tails.
Finished afghan without the edging = aproximately 32 by 32 inches. Each block measures 8 by 8 inches; 16 blocks, (4 blocks accross and 4 blocks down), are needed to make a 32 by 32 inch afghan. Each block uses aproximately 38 yds of yarn (38 x16= 608 yds). From this statistic, you can make
the afghan bigger and calculate how many yards needed.
It took me 1 hr and 5 mins. to finish a block. Probably can be done in 45 minutes with more focus.
The pattern uses the "Join as you go" method to connect the squares together. In this method, the first motif is finished up to the last round. The second and subsequent motifs are done up to the round before the last round. The new motif is being joined to the completed motif as the last round of the new or current motif is being made. See this technique on my other blog post here
The Pattern:
Make the foundation ring: Ch5, slst on 5th chain counting from hook to form a ring. Note: Letter (b) denotes that the stitch it precedes is the beginning stitch of the round. It is helpful to mark this stitch with yarn or hairpin in order to know if you have completed the round because the slst that completes the round is going to be made on it or part of its stitch.
R1: Ch1, sc(b) over ring; 15 sc over ring, slst on sc(b). There should be a total of 16 stitches counting from hook to hook. The completed round 1 is shown on photo below.

R2: Ch4(b), 1 tr on same stitch, (ch3, skip 1 stitch, 2tr on next stitch) 7 times, ch3, sc(b) on the 4th chain of ch4b. Photo below shows completed Round 2.

R3: Ch2, sc on next tr post, 4sc on next space (sc next tr post, ch2, sc on next tr post, 4sc on next space) 7 times. Slst on sc(b). Photo below shows completed Round 3.

R4: Sc(b) on next ch-2 space, [ch7, sc on same space, (ch3, skip 3 sc, sc on next sc, ch3, sc on next ch-2 space) 2 times]. Repeat [ ] 3 times. Ch7, sc on same space, ch3, skip 3 sc, sc on next sc, ch3, sc on next ch2 space, ch3, sk next 3sc, sc on next sc, ch3, slst on sc(b). Photo below shows completed Round 4.

R5: Slst next 3 stitches of ch-7 loop. Sc(b) on same ch-7 space. Sc on same sp. [Ch5, 2sc on same space, (ch3, sc on next space) 4 times; ch3, sc on next ch-7 space] 3 times. Ch2, 2sc on same ch7 space, (ch3, sc on next sp) 4 times; Ch3, slst on Sc(b). Photo below shows completed Round 5.

R6: Ch3(b), dc on next st, 2dc on next sp, *ch3, 2dc on same space, dc next 2 sts, ch3, skip next sp, sc on next sp( ch3, sc next sp) 2 times; ch3, skip next ch-3 space, dc on next 2 sts, 2 dc on next Ch-2 space,* rep * * around. Ch3, slst on 3rd chain of ch3(b). Photo below shows completed round 6
R7: Ch5(b), skip 1 stitch, dc next 2 stitches, *2dc next ch-3 space, ch3, 2dc on same space, dc on next 2 dcs, ch2, skip 1 stitch; dc on next dc, ch3, skip next ch-3 space, (3dc on next space) 2 times, ch3, skip next ch-3 space, dc next dc, ch2, skip 1 stitch, dc next 2 dcs.* Rep * * around. Ch3, slst on 3rd ch of ch5(b). Photo below shows the completed R7.

R8: Sc(b) on next st, ch3, skip 2 dc posts, sc next st, [ch3, 2dc next space, ch3, 2dc same space; ch3, skip next 2 dc posts, sc next stitch, (Ch3, sc next sp) 2 times. ch3, skip 1 dc, dc on next 4dcs; (ch3, sc next space) 2 times, ch3, skip next 2 dc posts, sc on next stitch] 3 times. Ch3, 2dcs on next space, ch3, 2dcs on same space, ch3, skip 2 dcs, sc next st, (ch3, sc on next space) 2 times, ch3, dc next 4 dcs, ch3, sc on next space, ch3, slst on sc(b). Photo below shows the completed R8. NOTE: IF THIS IS THE FIRST SQUARE CONTINUE TO TO ROUND 9A, IF THIS IS THE SECOND or SUBSEQUENT SQUARES, FOLLOW INSTRUCTIONS "HOW TO JOIN NEW SQUARE TO OLD SQUARE WHILE DOING R9." Photo below shows the completed R8.

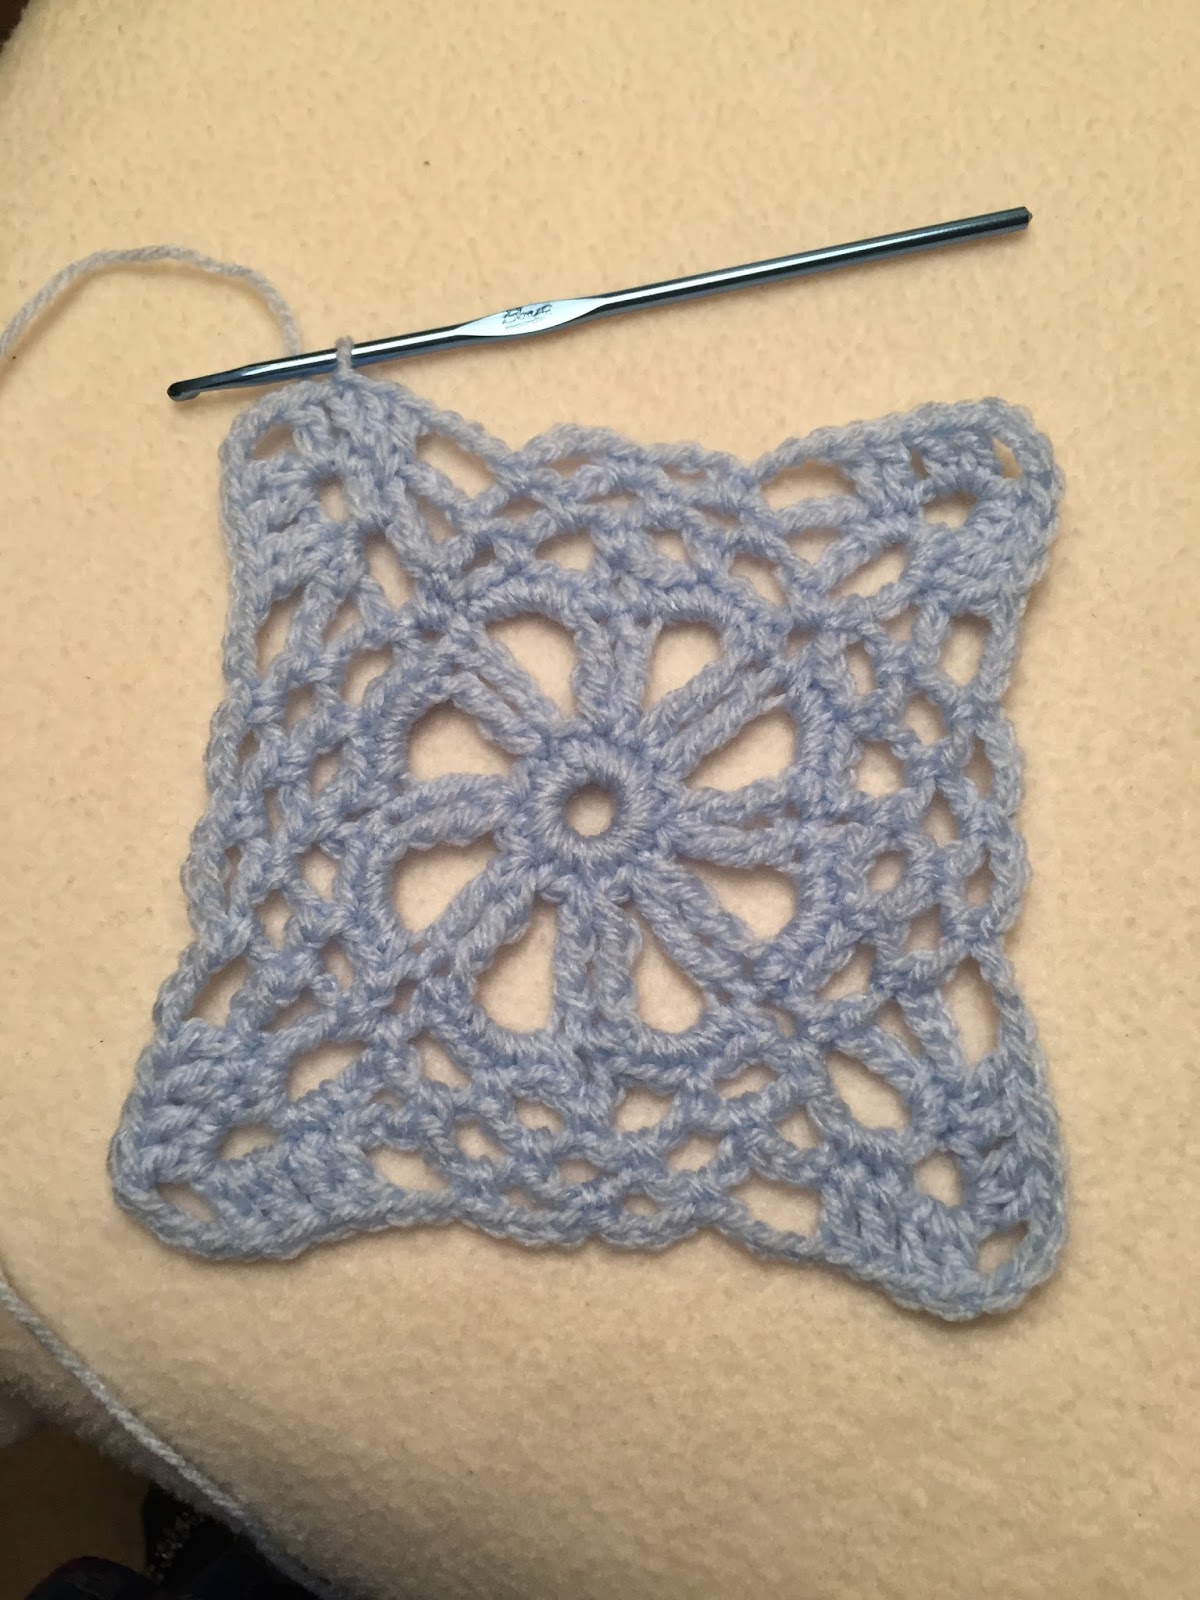
R9A: Slst on next 2 stitches, sc(b) on same space, (ch3, sc next space) 2 times, [ch5, sc on same space, (ch3, sc on next space) 4 times; ch5, skip 4 dcs, sc next space, (ch3, sc next space) 4 times.] Rep [ ] 3 times. Ch5, sc on same space, ch3, sc on next space) 4 times; ch5, skip 4 dcs, sc on next sp, ch3, sc on next sp, ch3, slst on sc(b). Fasten off leaving a 6 -7 inch yarn tail and using a yarn needle, weave in yarn tails on wrong side of work.
Photo below shows the completed Round 9 of first square.

How To Join New Square To Old Square while doing R9:
@ = Follow instructions starting at this symbol on R9A.
O = (Old motif). The completed square motif is shown as the top motif on photo below.
N = (New/subsequent motif). The new square motif is shown as the bottom motif on the photo below.

R9B: Joining: Working on the next ch-3 space of N, slst on next st, sc(b) on next stitch, *(ch3, sc on next ch-3 space) Repeat ( ) until corner space of previous round. Begin joining at corner spaces of both motifs: With wrong sides of O and N facing together, lay N over O. Ch2 on N, sc on corner ch-5 space of O, ch2, sc on same ch-3 space of N; (ch1, sc on next space of O, ch1, sc on next space of N ) 4 times; ch2, sc on ch-5 space of O, ch2, skip 4 dc posts of N, (sc on next space of N. Ch1, sc on next space of O) 4 times. Ch1, sc on next corner space of N, ch2, sc on corner ch-5 space on O, ch2, sc on same space of N. Joining is completed. Finish this round following instructions for R9A beginning at @ symbol. Photo below shows the two joined squares. Fasten off leaving 7 inch tail.


Comments
Post a Comment