Snow Flower Shawl - Making The Yoke
Materials:


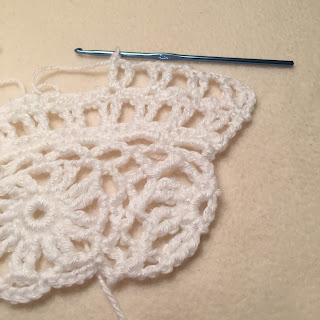
Working from N, Ch3, Insert hook from wrong side of next ch-7 loop of O and make a sc; working from O, insert hook from right side of next space of N and make a sc. See photo below.


Crochet Hook, 3.75mm
Yarn Needle
Pattern is for Right handed crochet.
Adult Size Shawl: Sm. to Med. Note: I'll write the pattern for individual flower later. For now, this part is a documentation on how the flowers are interconnected to make the shawl.
Making The Flower Motif And Using The Join As You Go Method:
R1: Ch5, slst on 5th ch from hook to form ring. (B)ch1. 15 sc over ring. Slst on (B)ch1.
R2: (B)Ch4, tr on same st. (Ch3, skip next st, 2tr on next st) 8x. Ch3, tr on 4th chain of (B)ch4.
R3: Making the joining loop--Slst on next 2 stitches. (B)Sc on this space, (Ch7, sc on next sp)7x. Ch5, slst on (b)Sc. Note: One flower motif completed.

Connecting Two Motifs: Note that the second and subsequent motif is done up to R2. On R3, the new motif is being joined to the old motif as R3 is being worked on the new motif.
N= New motif; O = old motif
R3 of new and subsequent motif: Working from new motif, Ch3, insert hook from wrong side of any ch-7 loop of O and make a sc; working from O, ch3, insert hook from right side of next sp of N and make a sc. See photo below.


Continue R3 on N: (Ch7, sc on next sp) 5x. Ch7, sc on (b)sc. Fasten off.
Make as many flower motifs as required to make the yoke. This pattern is written for small to medium size.
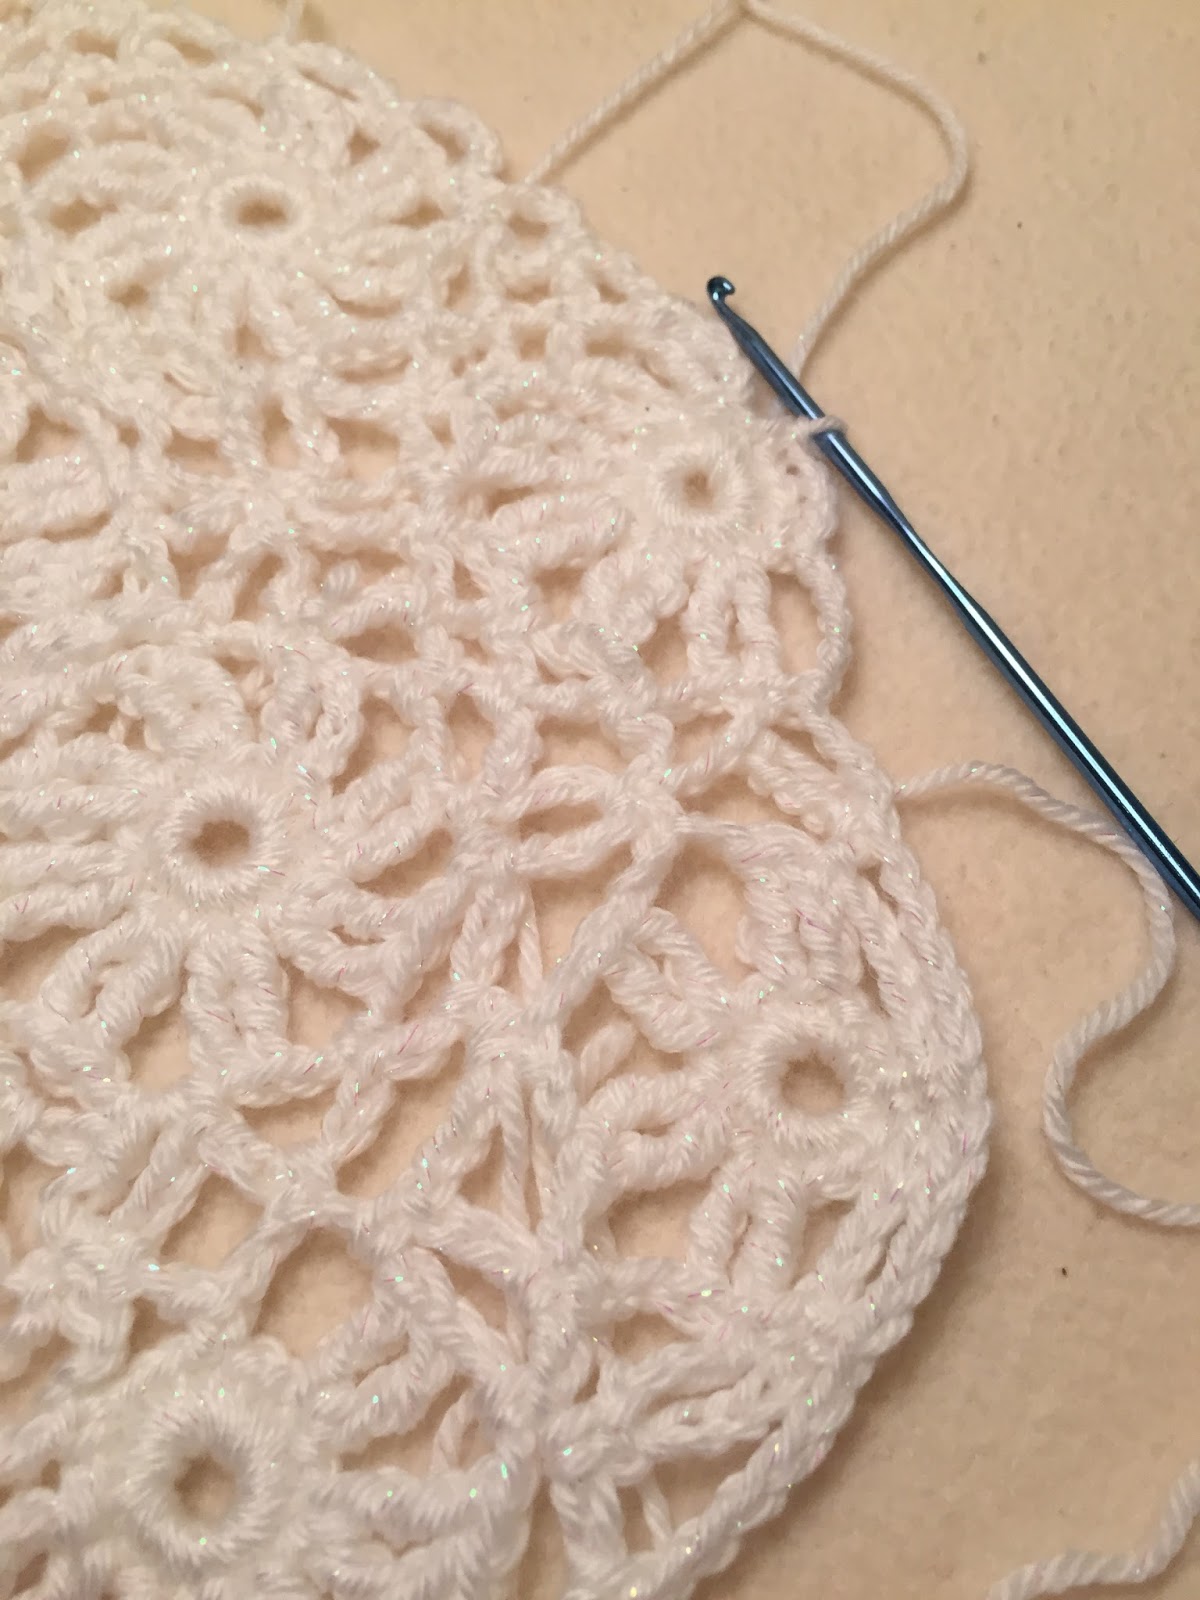
Making The Yoke: I connected 8 flower motifs as shown on photo below.

I add 2 incomplete flower on each side of the front part of the yoke, see photo below.

Joining half a flower on one side of front yoke.

Finish joining the incomplete flower (4 petals) - above photo

Incomplete flower (4 peteals) needs to be added on the other side.
Added 2 complete flowers on back of yoke and 2 incomplete flowers with 6 petals on each side to give the yoke a rounded corner.

Added 1 complete petal on the center back of the yoke as shown on photo below.

Added 2 incomplete flowers with 4 petals on each side of the complete flower as shown on photo below.

At this point I have used up 1 ball of the yarn shown above which is aproximately 164 yds/150 m per ball. I have made a total of 10 complete flowers and 7 incomplete flowers. The approximate size of individual flower motif is 3.5 inches.
Finishing the Yoke: Attatch a whole ball of yarn on the 2nd ch of ch-4 which is part of incomplete petal in front side of yoke. See photo below.

(Ch5, sc on next sp) 2x; (ch3, sc on next sp) 2x; (ch5, sc on next sp) 2x. (Ch3, sc next sp) 2x, ch5, sc on next sp, (ch3,sc on next sp) 3x; ch5, sc on next sp, Ch3, sc next sp, [ch5, skip next tr post, sc on next st]. See where the crochet hook is in photo below where this instruction [ ] had been completed.

Ch3, sc on next sp, ch5, sc on next sp; Ch5, skip next sp, sc on next sc. See photo below.

Ch5, sc on next sp close to the slip stitch. See photos below.


Ch5, sc on the ch-5 loop of next flower motif. See photo below.

(Ch5, sc on next ch-5 loop of the same flower motif) 2x; Ch5, skip next ch-5 sp, sc on next sc. Note the other side of the yoke is being mirrored to maintain a symmetrical shape.
Ch5, sc on next sc, ch5, sc next sp, ch3, sc on next st/tr post, see where the hook is on photo below.

ch5, skip tr post ,sc on next st; ch 3, skip 4 sts, sc next st. See photo below.
Ch5, skip next tr post, sc on next sp, ch3, sc next sp, Ch3, sc next sp, ch5, sc next sp; (ch3, sc next sp) 3x. Ch5, sc next sp, ch3, sc next sp) 2x. Ch5, sc, next sp; (ch3, sc next sp) 2x; ch5, sc next sp2. Ch5, sc on 2n stitch of the next tr post of next incomplete flower motif, see where hook is on photo below.

Turn work wrong side up.
R1: Make 5 esc on all ch-5 spaces and 3 esc on all ch-3 spaces; make 1 esc on all sc stitches. See photo below.

The shaping of yoke finished, see photo below.

Making the rest of the shawl:
R2: Turn right side up. Sc on same stich. Ch3, skip 1 stitch, tr on next stitch, ch1, tr on same stitch *ch2, skip next 2 sts, tr on next st, ch1, tr on same stitch, ch1, tr on same stitch.* Repeat * * across. See photo below.

R3: Turn wrong side up. Ch2, skip 1 st, sc on next post,* ch1, sc on next post.* Rep * * across. Sc on 4th Chain of previous row. See photo below.

R4: Turn right side up. Sc on same stitch. Ch3, tr on next ch-1 sp; ch1, tr on same sp. *Ch1, skip next ch-1, sp, tr on next ch-1 sp, ch1, tr on same sp.* See photo below. Rep * * across.

R5: Turn wrong side up. Ch5, Tr on next stitch. Ch3, sc on next stitich. Skip 1 tr post, *sc next ch-1 sp, ch3, skip 3 stitches, which makes up the next "V" stitch,* rep * * across. Ch3, tr onlast stitch of row. See photo below. Fasten off.

Making the Flower edging: Ch5, slst on 5th chain from hook to form a ring. Make 16 sc over ring. slst on 1st sc that was made to form a circle. Ch4, tr on same stitch; (ch3, skip next stitch, tr on next stitch, tr on same stitch. NOTE: ONE PETAL MADE) 5x. Ch5 after the 5th petal. Flip work wrong side up, skip 1 petal, tr on next ch-3 sp; flip work right side up. Ch10, Insert hook on 5th ch from hook, yo and draw up a loop; rotate work clockwise. See photo below.

Above photo shows work (5-petal motif) before it was rotated clockwise or in other words placed on the right side of the hook.

Above photo shows after the 5-petal motif was moved to the right of the hook. Note that the slip stitch is done after the work is rotated to the right, which completes the new ring, to which a new flower motif will be crocheted over.
Ch1, 16 sc over ring. Ch4, sc on 5th ch from ring; tr on tr.
See video on how to connect the half-flower motif edging onto the shawl.
Photo below shows the edging attached to the shawl. Note that the flower edging uses a differen ball of yarn and another ball of yarn is used to join the edging and the shawl. Note also that the flower edging is longer than what is needed. This was done to make sure that the edging is long enough to go across the outer edge of the shawl. The excess flowers will be unraveled when joining is completed. The other ball of yarn is not cut after joining the flower and shawl but instead, it is used to finish the flower edging. Without finshing the flower edging they tend to curl out. The sc stitches corrects that problem. See the joined edging and shawl below.


Finishing The Front and Neckline: R1
Turn work right side up. The front edge is mostly finished by making either ch-5-sc-next st of next loop; ch-3-sc on next st of next loop, or ch2-sc-on next st of next loop. Use whichever stitch will make the edges more even instead of jagged. Study photos below.


How To Maintain Symmetry: Fold the yoke to find the center back of the neckline, mark the center. From this point on replicate stitches made on the other side of the yoke to this side of the yoke. It can be done by folding the yoke as shown on photo below and look at each loop and copy the number of chains made. This should make both sides measurement the same.


Finishing The Flower Edging:
Starting at the stitch marked by the purple paper clip, see photo below,

(Ch2, skip 1 stitch, sc on next stitch 8x. Ch2, sc on the 3rd chain of the next ch-3 space of next flower), see phto below.

(Ch2, skip 1 stich, sc on next stitch) 6x
Repeat ( )Across until the flower before the last flower edging, on the last flower make, (Ch2, skip1 stitch, sc on next st) 8x. See photo below. This ends where the green clip is.

Finishing Front/ Neckline-- R2: Beginning where the last stitch is made on the last flower edging, Ch2, sc on the first stitch of the next ch-5 space, 2sc on same sp; 3dc on same sp, 5dc on next ch-5 sp. (4 tr on next space) 2x. 3tr on next sp, 4 tr on next sp; dtr on next st, ch1 for button hole, dtr on next sp, 2 tr on same sp, dc on next st, 2dc on next sp,2 sc on same sp, 2 sc on next sp. (ch3,sc next sp) 2x; (ch2, sc on next sp) 3x. Ch3, sc next sp..... the number of chain depends on the number of chains in the previous row. if the sc is to be hooked onto a ch-3 of previous row then the number of chain preceding the sc must be 3 but when 3 chains preceding the sc results the neckline being loopy or jagged then decrease the current chain to two to achieve a more straight and even neckline. REMEMBER TO MIRROR THE OPPOSITE SIDE OF THE NECKLINE AND THE FRONT. See photo below.

All I need to do is hide the yarn tail and this project will be finished. Todays date is January, 19, 2017. I look forward to watching the inauguration of the new President, Donald Trump on TV tomorrow.


Comments
Post a Comment