Beginning Crochet Instructions
Yo = Yarn over - means lay the yarn over the crochet hook counter clockwise.
This tutorial is for right handed crocheter.
How To Make The Slip Knot In Order To begin Making Chain Stitches.
Chain (ch) Stitches in crochet is usually used to make the foundation stitches in any crochet project.
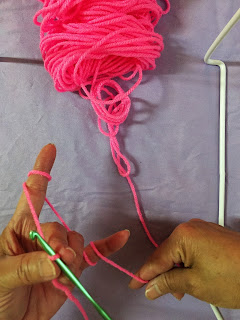
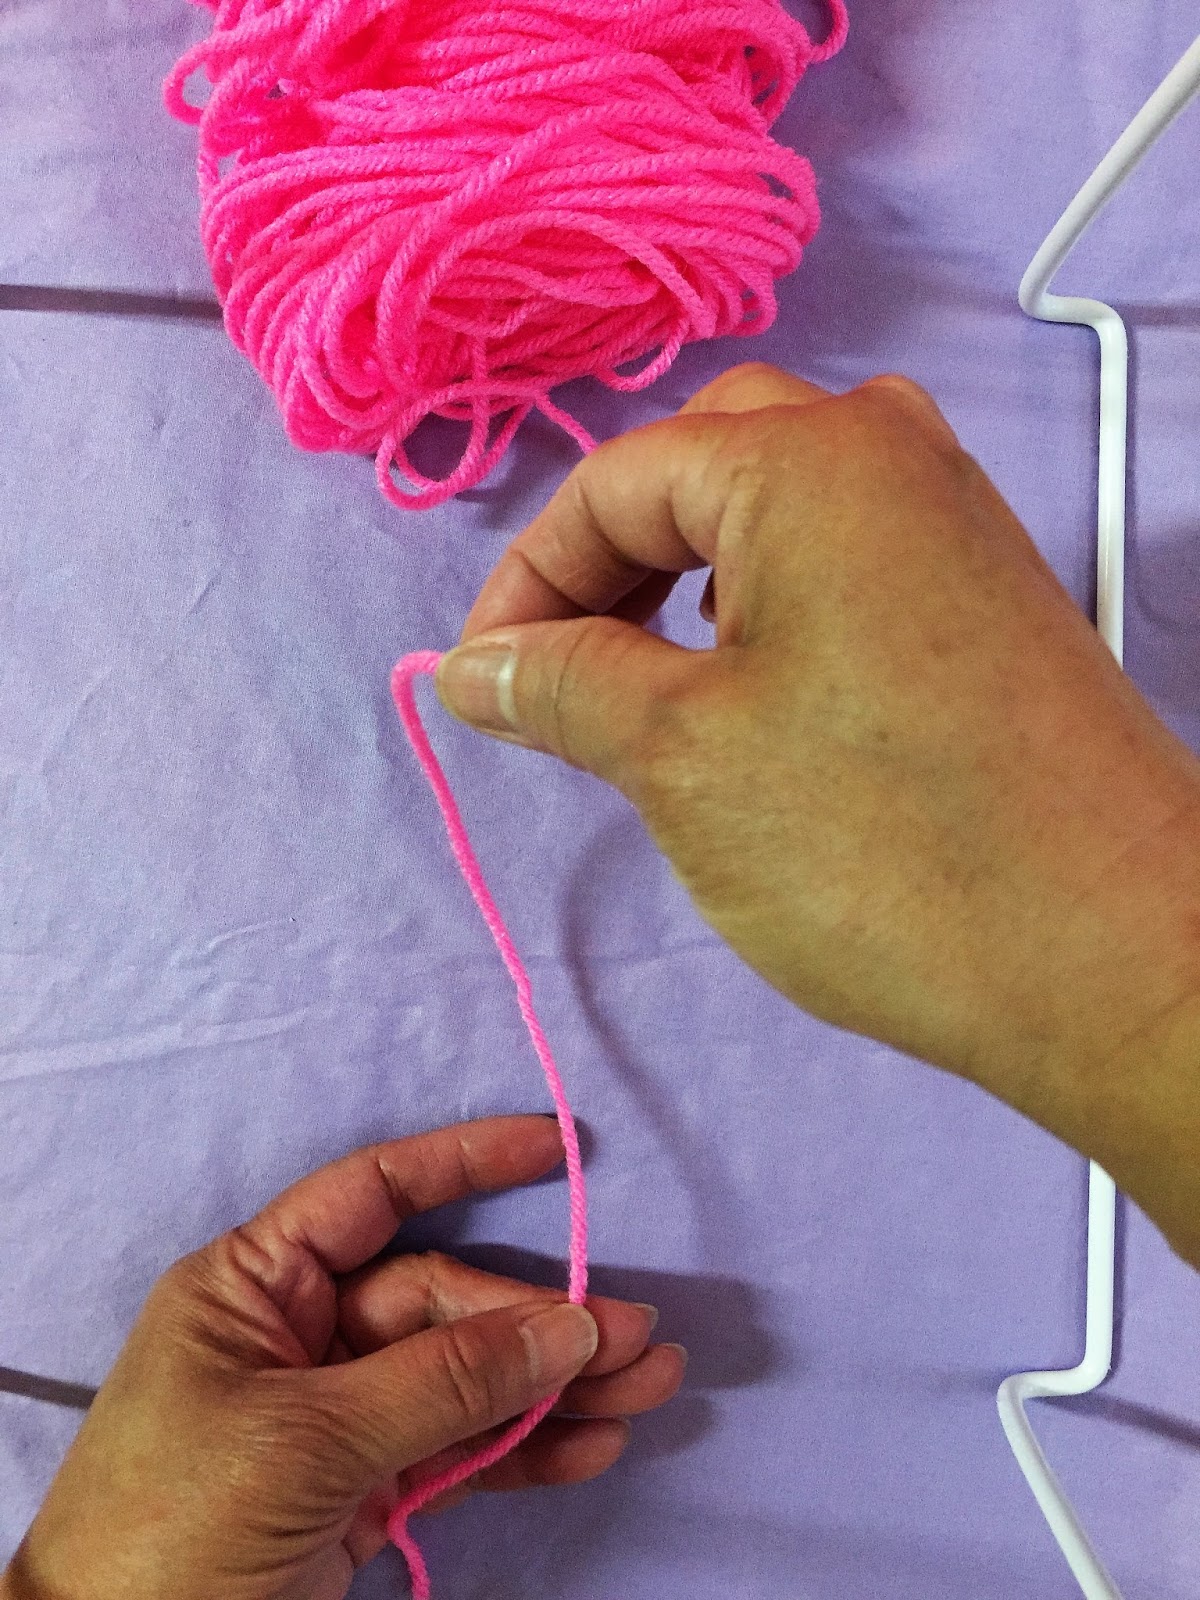
Step 1: Hold the yarn with working end of the yarn, which is the part of yarn facing toward the skein or ball of yarn and the beginning tail of the yarn toward you. See photo below.

Step 2: With left hand holding the tail of the yarn, pick up the working end of yarn with right hand. See photo below.

Step 3: Rotate the working end of yarn counter clock-wise to make a figure 4 or backward "p", see photo below.

Step 4: Put the thumb and index finger of right hand inside the figure 4 or "p". See photo below.

Step 5: With the thumb and index finger remaining inside the figure 4 or backward "p", pick up the working end of yarn and draw it up towards the center of the figure 4 or backward "p". See photo below.

Step 6: Pull up this working end, see photo below.

Step 7: Tug on the beginning tail (the tail facing you) to tighten the figure 4 or backward "p" loop.

Step 8: Slip the hook inside the working end loop. See Photo below.

Step 9: Tug on the working end so that the loop tightens around the crochet hook. Pull this loop loosely around the crochet hook so that the hook is able to go through it easily.

How To Wind The Working Yarn (Classic Method): Continuation of above steps:
Step 10: With left hand continuing to hold the slip stitch and crochet hook, and working end of yarn still held by right hand, lay yarn over the left index finger. Wind the working end of yarn around left index finger once. See photo below:

Step 11: Continue to bring the working end of yarn underneath the little finger of your left hand. See photo below.

Step 12: Wind the working end up and over the same little finger, and tuck it under the little finger.

Step 13: Turn left hand up so that palm is facing you.
Step 14: Continue to hold the slip knot and hook with your left hand. Using the right hand tug on the beginning tail (tail facing you) one more time and make it tight. At this point, you are ready to make your first chain (ch).


How To Make The First Chain ( Continuation of above steps):
Hold the crochet hook with thumb, index and middle finger of right hand with the thumb placed at the flat portion of crochet hook; the index finger grasping the crochet hook opposite the thumb and the middle finger laying on the loop on hook. Hold the slip knot with the left hand. The hook part of the crochet hook should be pointing toward you and toward your thumb Study closely the photo below.

15: Yo (yarn over)
16: Draw the yo you just made through the one loop on hook. You just made your first chain (ch). Crochet instructions for this will say: Ch1. To make a series of chain stitches (ch sts) from this point on, just repeat steps 15 to 16 until you meet the required number of chain stitches specified by a pattern.
How To Make A Slip Stitch
Slip Stitch: A slip stitch is the shortest of all working stitches such as: Single crochet (Sc), double crochet (dc), triple crochet (tr) and other crochet stitches that are variations of the above mentioned working crochet stitches. It is useful in ending a crochet worked in the round and also in working up to where the next round of crochet work should begin.
To make a slip stitch (slst) follow the steps below:
To do the slip stitch, there should already be some kind of existing stitches beforehand into which the slip stitch should be made.
1. Insert hook on next stitch or on a stitch that a crochet pattern specifies.
2. Yo,
3. Draw up yo that you made on step 2 through the stitch or space where you inserted hook and on loop on hook.
Repeat Steps 1 to 3 to make another slip stitch on the next stitch.
How To Make A Single Crochet(sc): Make ch1 (this is the turning chain for sc).
1. Insert hook on 3rd chain or stitch,
2. Yo,
3. Draw up the yo through the chain or stitch where you inserted hook on step 1 so that there are now 2 loops on hook.
4. Yo,
5. Draw up this yo through 2 loops on hook. There is only 1 loop on hook remaining and sc stitch is completed.
Repeat steps 1 to 5for to make another sc stitch as the pattern specify.
This tutorial is for right handed crocheter.
How To Make The Slip Knot In Order To begin Making Chain Stitches.
Chain (ch) Stitches in crochet is usually used to make the foundation stitches in any crochet project.
Step 1: Hold the yarn with working end of the yarn, which is the part of yarn facing toward the skein or ball of yarn and the beginning tail of the yarn toward you. See photo below.

Step 2: With left hand holding the tail of the yarn, pick up the working end of yarn with right hand. See photo below.
Step 3: Rotate the working end of yarn counter clock-wise to make a figure 4 or backward "p", see photo below.

Step 4: Put the thumb and index finger of right hand inside the figure 4 or "p". See photo below.

Step 5: With the thumb and index finger remaining inside the figure 4 or backward "p", pick up the working end of yarn and draw it up towards the center of the figure 4 or backward "p". See photo below.

Step 6: Pull up this working end, see photo below.

Step 7: Tug on the beginning tail (the tail facing you) to tighten the figure 4 or backward "p" loop.

Step 8: Slip the hook inside the working end loop. See Photo below.

Step 9: Tug on the working end so that the loop tightens around the crochet hook. Pull this loop loosely around the crochet hook so that the hook is able to go through it easily.

How To Wind The Working Yarn (Classic Method): Continuation of above steps:
Step 10: With left hand continuing to hold the slip stitch and crochet hook, and working end of yarn still held by right hand, lay yarn over the left index finger. Wind the working end of yarn around left index finger once. See photo below:

Step 11: Continue to bring the working end of yarn underneath the little finger of your left hand. See photo below.

Step 12: Wind the working end up and over the same little finger, and tuck it under the little finger.

Step 13: Turn left hand up so that palm is facing you.

Step 14: Continue to hold the slip knot and hook with your left hand. Using the right hand tug on the beginning tail (tail facing you) one more time and make it tight. At this point, you are ready to make your first chain (ch).


How To Make The First Chain ( Continuation of above steps):
Hold the crochet hook with thumb, index and middle finger of right hand with the thumb placed at the flat portion of crochet hook; the index finger grasping the crochet hook opposite the thumb and the middle finger laying on the loop on hook. Hold the slip knot with the left hand. The hook part of the crochet hook should be pointing toward you and toward your thumb Study closely the photo below.

15: Yo (yarn over)
16: Draw the yo you just made through the one loop on hook. You just made your first chain (ch). Crochet instructions for this will say: Ch1. To make a series of chain stitches (ch sts) from this point on, just repeat steps 15 to 16 until you meet the required number of chain stitches specified by a pattern.
How To Make A Slip Stitch
Slip Stitch: A slip stitch is the shortest of all working stitches such as: Single crochet (Sc), double crochet (dc), triple crochet (tr) and other crochet stitches that are variations of the above mentioned working crochet stitches. It is useful in ending a crochet worked in the round and also in working up to where the next round of crochet work should begin.
To make a slip stitch (slst) follow the steps below:
To do the slip stitch, there should already be some kind of existing stitches beforehand into which the slip stitch should be made.
1. Insert hook on next stitch or on a stitch that a crochet pattern specifies.
2. Yo,
3. Draw up yo that you made on step 2 through the stitch or space where you inserted hook and on loop on hook.
Repeat Steps 1 to 3 to make another slip stitch on the next stitch.
How To Make A Single Crochet(sc): Make ch1 (this is the turning chain for sc).
1. Insert hook on 3rd chain or stitch,
2. Yo,
3. Draw up the yo through the chain or stitch where you inserted hook on step 1 so that there are now 2 loops on hook.
4. Yo,
5. Draw up this yo through 2 loops on hook. There is only 1 loop on hook remaining and sc stitch is completed.
Repeat steps 1 to 5for to make another sc stitch as the pattern specify.
Comments
Post a Comment